For years, I was a JPEG shooter. Not by accident—by stubborn, misguided choice. I'd read the forums, heard the arguments about dynamic range and white balance, and nodded along. But deep down, I told myself that RAW was for pixel-peepers and perfectionists. I was a "get it right in camera" kind of photographer. JPEG was faster, smaller, and good enough.
Then, three weeks ago, a friend asked me to shoot her corporate gala. It was a big deal—dimly lit ballroom, mixed lighting (candles, colored stage lights, and those awful orange tungsten spots), and absolutely no second chances. I had one shot to get it right. And something told me that "good enough" wasn't going to cut it.
So I made a decision. I switched my camera to RAW+JPEG, bought an extra 128GB card, and took the plunge. What followed was equal parts panic, exhaustion, and revelation. This is the story of what happened when I shot an entire event in RAW for the first time — and why I'll never go back.
The Fear That Kept Me Stuck in JPEG
Let me be honest: I was scared of RAW. Not of the files themselves, but of everything that came with them. The size. The processing time. The dreaded "I have no idea what I'm doing" feeling when I opened a flat, gray RAW file for the first time.
For years, I'd read that "RAW files are a lot bigger than the same dimension JPEG" . And that was true. My 24MP camera produced 30-40MB RAW files versus 8-10MB JPEGs. I did the math: 1,000 photos meant 40GB of storage. That felt terrifying.
I'd also convinced myself that I didn't need RAW. After all, I was pretty good at getting exposure right. I knew my camera. I could dial in white balance. Why complicate things? "If you're nailing your color and your exposure, you're removing two of the big advantages of Raw" . I thought I was that photographer.
I wasn't.
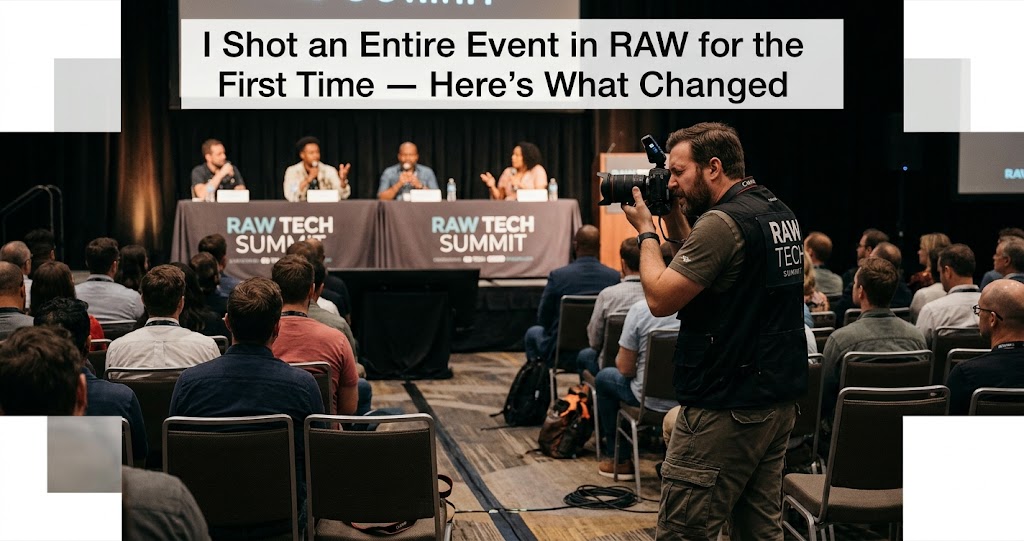
The Event: A Lighting Nightmare
The gala was held in a converted warehouse with floor-to-ceiling windows on one side and exposed brick on the other. Sounds cool, right? It was. It was also a lighting disaster.
The setup was a photographer's worst nightmare: warm tungsten uplighting on the walls, cool LED spotlights on the stage, candles flickering on every table, and through the windows, the deep blue of twilight. My camera's auto white balance was having a seizure. Every frame looked different.
I'd shot events before — family gatherings, birthday parties, the occasional corporate headshot — always in JPEG. But those were controlled environments. This was chaos. And I knew, deep in my gut, that JPEG would betray me.
So I made the call. I switched to RAW+JPEG, set my camera to record RAW on card 1 and JPEG on card 2, and took a deep breath.
By The Numbers
RAW files captured
Total storage used
Total editing time
Lesson 1: The Buffer is Real (And Painful)
The first shock came during the event itself. I was shooting bursts — the keynote speaker's gestures, a group laughing, the moment the auction winner raised their paddle. My camera, which never missed a beat shooting JPEG, started to choke.
The buffer filled after about 15-20 RAW frames. The camera slowed to a crawl. I missed shots while waiting for the write speed to catch up.
In retrospect, this was my fault. I hadn't tested my buffer depth before the event. I didn't know that "high-action events like sports, concerts, or fashion shows require a lot of photos to be taken in very short spurts of time" , and that RAW can be a bottleneck.
My solution? I learned to shoot more deliberately. Instead of holding down the shutter and hoping for the best, I waited for the moment. I anticipated. I shot in shorter bursts. And you know what? My keep rate went up. I was thinking more, spraying less.
1 Know Your Buffer Limits
Before you shoot an event in RAW, test your camera's buffer depth. Fill the buffer, time the write speed, and plan your shooting cadence accordingly. For my camera, 15 frames was the limit — so I shot in bursts of 8-10 and gave the buffer time to breathe.
Lesson 2: Storage is Cheaper Than Regret
After the event, I had 1,247 RAW files. Forty-two point three gigabytes. My 256GB laptop drive whimpered.
But here's what I learned: "I can fit almost 3000 lossless compressed 40MP photos on a 128GB card, going on to a 24TB drive, so space isn't the issue" . Storage is cheap. External SSDs are affordable. Cloud storage exists. The cost of storage is negligible compared to the cost of losing a shot.
I bought a 2TB external SSD for $120. Problem solved.
Lesson 3: Culling is an Art Form
When I got home, I had 1,247 images. I needed to deliver 150-200 final shots. That's an 85% cull rate.
I developed a workflow that saved my sanity:
This workflow took about 3 hours for 1,200 images. It was tedious, but it was also meditative. I learned to be ruthless. Good wasn't good enough. Only great survived.
Lesson 4: The RAW Safety Net is Real
Here's where everything changed.
About 200 images into the event, my camera's auto-exposure freaked out. I was moving from the dimly lit cocktail area to the brightly lit stage, and my camera overcompensated. I ended up with a series of images that were underexposed by nearly two stops.
If I'd been shooting JPEG, those images would have been trash. The shadows would be black voids. The colors would be muddy. The noise would be unbearable.
But I was shooting RAW.
In Lightroom, I boosted exposure by 1.7 stops, lifted the shadows, and reduced the noise. The results were stunning. "RAW files contain considerably more data than JPEGs, giving you greater flexibility in post-processing" . I could see that data working in real-time.
Images that would have been deleted were now keepers. Not just keepers — good shots. The speaker's expression was perfect. The moment was preserved. And I had RAW to thank.
2 Underexposure is Recoverable
"With Raw files you have the ability to pull back up to two stops of overexposure! Your JPEG file would just be a grey mess if you tried doing that" . The same is true for underexposure. RAW gives you a safety net that JPEG simply doesn't.
Lesson 5: White Balance Freedom is Addictive
Remember those mixed lighting conditions? The tungsten uplights, the LED spots, the candlelight, the twilight? My camera's auto white balance produced images ranging from warm orange to cool blue to sickly green.
With JPEG, I'd have been stuck. I could tweak white balance a little, but the color data was baked in. "Once the mapping is done, you can't go back; the lost data is lost" .
With RAW, white balance is just a slider. I shot a gray card at the beginning of the event (a tip I'd read online), and in Lightroom, I used it to set a consistent white balance for the entire set. Then I tweaked individual images as needed.
The result? Every image had accurate, natural color. The skin tones were consistent from shot to shot. The ambiance of the event was preserved. "Being able to change this after the shot is exposed is a blessing" .
Lesson 6: High ISO Noise is Manageable
Event photography means high ISO. I was shooting at ISO 3200-6400 for most of the night. With JPEG, those images would have been noisy messes. In-camera noise reduction is crude and destructive.
But with RAW, I had options. I used Lightroom's AI Denoise feature, which "is a Godsend here and it currently only works on Raw" . The results were remarkable. Noise was reduced without losing detail. Skin remained natural. Textures were preserved.
I also experimented with shooting at lower ISOs and pushing exposure in post. "The dynamic range of raw is no greater than it is for JPEG" , but the number of tonal steps is. This gave me flexibility to protect highlights in camera and recover shadows later.
Lesson 7: My Workflow Had to Evolve
Before this event, my editing workflow was simple: import JPEGs, do a quick cull, adjust exposure and white balance in Lightroom (sometimes), export. It took 1-2 hours for 500 images.
RAW forced me to be more systematic. Here's the workflow I settled on:
- Import with preset: "Copy to new location and add to catalog, render 1:1 previews, Adobe Color profile and Auto applied for exposure adjustment"
- Two-pass cull: First for technical rejects (OOF, eyes closed), second for composition and storytelling
- Batch adjustments: Apply consistent white balance, lens corrections, and noise reduction to similar lighting conditions
- Selective editing: Fine-tune exposure, color, and contrast on final selects
- Export: "Finally, mark all other keepers as 3* and export... job done"
This workflow took about 6 hours for 1,200 images. Was it longer than JPEG? Yes. Was it worth it? Absolutely.
Lesson 8: The Client Didn't Know, But I Did
Here's the thing about RAW: the client will never know you shot it. They won't see the files. They won't ask. They'll just receive beautiful, polished JPEGs and be happy.
But I knew. I knew that I'd salvaged shots that would have been lost. I knew that the colors were accurate and consistent. I knew that the noise was controlled without losing detail. And that knowledge changed everything.
I delivered the gallery, and my client was thrilled. "These are the best event photos we've ever had," she said. She didn't know about the underexposed frames I'd rescued or the white balance I'd corrected. She just saw beautiful images.
But I knew. And that confidence — knowing that I could handle whatever lighting chaos the next event threw at me — was priceless.
3 Confidence is the Real ROI
Shooting RAW isn't just about better images. It's about peace of mind. It's about knowing that you have a safety net. It's about walking into challenging lighting situations without fear. That confidence translates directly into better work.
What I Wish I'd Known Before the Event
Looking back, there are things I wish I'd done differently. I wish I'd tested my buffer depth. I wish I'd bought faster memory cards. I wish I'd practiced my culling workflow before I had 1,200 images staring at me.
But mostly, I wish I'd made the switch years ago.
"There's no downside surely? Well, Raw files are a lot bigger than the same dimension JPEG... Under most circumstances, this is not an issue" . I'd let fear of file sizes and processing time hold me back for years. And I'd missed out on countless opportunities to learn and improve.
The Verdict
Keep rate from RAW vs ~70% from JPEG
Extra stops of shadow recovery
Peace of mind
The Moment Everything Clicked
There was a moment, about halfway through the edit, when I was working on a particularly challenging frame. The image was underexposed by a stop and a half, the white balance was off, and there was noticeable noise in the shadows.
In my JPEG days, I would have deleted this frame without a second thought. But because it was RAW, I decided to see what I could do.
I boosted exposure, corrected white balance, applied noise reduction, and added a subtle vignette. The result was one of my favorite images from the entire event. The subject's expression was perfect. The composition was strong. And thanks to RAW, the technical flaws were invisible.
That was the moment I understood. RAW isn't about perfection. It's about potential. It's about capturing every possible bit of data so that you can decide later what the image should be. It's about respecting the moment enough to give it every chance.
Where I Go From Here
I'm never shooting JPEG-only again. That's the bottom line.
Will I shoot RAW for everything? No. For casual family snapshots, for test shots, for situations where I need to deliver images immediately, I'll still use JPEG. But for any work where quality matters — events, portraits, landscapes, anything I care about — I'm shooting RAW.
I've upgraded my memory cards to faster UHS-II cards. I've optimized my Lightroom catalog. I've built a culling workflow that works for me. And I've made peace with the fact that editing takes longer. Because the results are worth it.
"If your camera can handle it, shoot RAW+JPEG. That way, you can speed through the JPEG files for early clues to what you have. Then you can wait and process the RAW files later" . This is exactly what I do now, and it's the best of both worlds.
Your Turn
Have you made the switch to RAW? Are you still shooting JPEG? I'd love to hear your experiences. What scares you about RAW? What's held you back? Or if you've made the switch, what surprised you most?
For me, the biggest surprise was that RAW didn't make me a better photographer. It made me a more confident one. And that confidence allowed me to take risks, to push boundaries, to capture moments I would have otherwise missed.
The best camera is the one you have with you. But the best file format is the one that gives you options. And when it comes to options, nothing beats RAW.