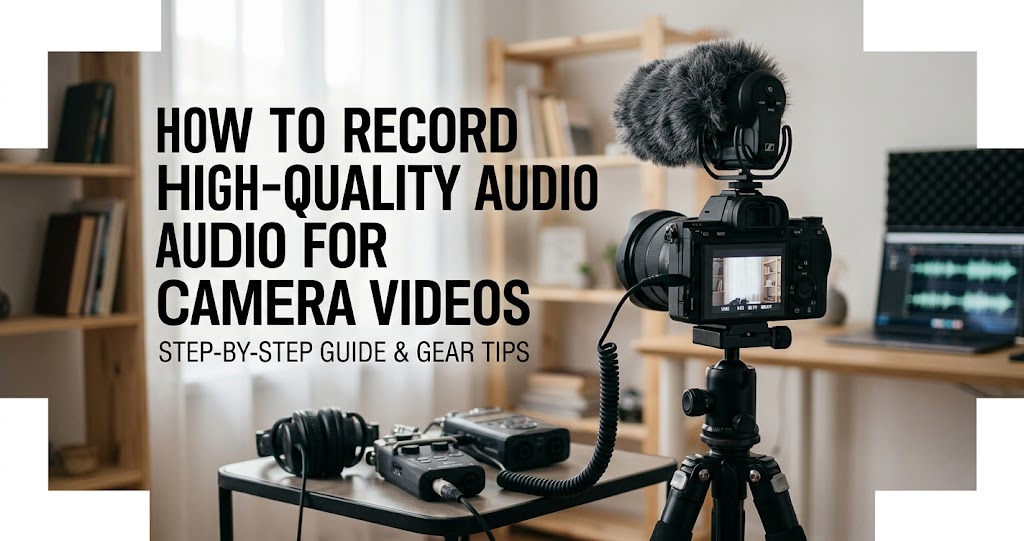
What do the most-watched and most commented videos in your niche have in common? Great haircuts? Perhaps, but more importantly: quality sound. If you've watched any video, you probably rarely ever noticed "good quality" audio, but you've definitely noticed videos with bad audio—muffled, distant voiceovers with pops and background noise .
This just doesn't fly on YouTube or any professional platform. The algorithm won't give these videos exposure because viewers don't watch them . In fact, broadcast engineer Mark Johnson puts it bluntly: "Audio is 70% of the viewing experience. If it sounds amateurish, viewers won't care how good the picture looks" . This comprehensive guide will teach you everything you need to know about capturing professional-quality audio for your camera videos.
Why Audio Quality Matters More Than You Think
Your video's soundtrack invites the audience to engage with your work both mentally and emotionally . When viewers give 100% of their focus to your video, you increase the chances of them subscribing, liking, commenting, and sharing .
Bad audio is distracting. Muffled, distant voiceovers with pops and background noise make viewers click away . The last thing you want is to publish what should be a fantastic video only to have the most memorable part be the dreadful soundtrack .
The Three Pillars of Great Audio
1 Control Your Recording Environment
The key to quality sound starts with your recording environment . Good audio starts at the source. You'll want to find a place without background noise—think traffic, air conditioners, noisy neighbors .
Indoor recording: Pay attention to echo and sounds from electrical devices in the room. A good solution is to create an improvised soundproof base using soundproof curtains or foam to reduce echo . If you're recording in a bedroom or home office, a dynamic microphone is often a practical choice—it focuses on the sound directly in front of it and reduces surrounding room noise .
Simple acoustic treatments:
- Add a rug if you have hard flooring
- Close curtains over large windows
- Record near sofas or other soft furnishings
- Use bookshelves to break up flat wall surfaces
- A closet filled with clothes works brilliantly—fabric absorbs sound naturally
Outdoor recording: Cars, wind, etc. can damage your recordings. Study the place you choose carefully . Protect your microphone with a windscreen or deadcat to minimize wind noise.
2 Choose the Right Microphone
Don't rely on built-in audio recording. How often do you see a YouTuber or podcaster recording audio into a camera? Never. They always have a mic because it allows audio to be recorded closer to its source . Built-in mics pick up handling noise, wind, and ambient room sound .
Lavalier / Lapel Mic
Small and wearable, popular for interviews and dialogue-based videos . Portable, offers wireless options, and broadcast quality sound . Popular models: Rode SmartLav+, Rode Wireless GO II .
Watch for: Fabric rustle, interference in wireless mode .
Shotgun Mic
Intended for one-direction recording . Great for picking up sound from a distance and focuses on the most prevalent sound in the shot's environment . Uses interference tubes to create a narrow polar pattern . Popular: Rode VideoMic Pro+, Movo VXR10-PRO .
USB Condenser Mic
Plugs into your computer, ideal for podcasts or audio files separate from the shot . Great for voiceovers, crisp and clear edge . Popular: Audio-Technica AT2020USB+ .
Portable Digital Recorders
Have built-in mics, act as hubs for different microphone types, and allow recording on multiple channels at once . Ideal for travel, walking interviews, hands-on documentaries . Popular: Zoom H5 .
Dynamic vs. Condenser: Dynamic mics focus on sound directly in front and reduce room noise—ideal for untreated spaces. Condenser mics capture more detail and brightness, widely used in professional studios, but can emphasize reflections in untreated rooms .
Placement tip: Keep the mic around 4 to 8 inches from your mouth and angle it slightly off to the side to soften popping sounds. Add a pop filter or foam windscreen for even smoother results .
3 Set Your Levels and Monitor
Getting your levels right is one of the simplest ways to sound more professional .
Speak at normal volume, aim for peaks around -6dB to leave headroom
Before recording, speak at your normal performance volume and watch the audio meter. You want consistent movement without the levels reaching the very top. If the signal peaks too high, distortion creeps in. If it's too low, boosting it later can introduce hiss or unwanted noise .
Monitor with headphones. One habit that helps immediately is wearing headphones while recording. Monitoring your audio in real time lets you hear background noise, echo, or distortion as it happens. It's a small step that saves a lot of editing later .
Recommended Recording Settings
Most modern recording apps and audio interfaces support 48 kHz/24-bit by default. These settings work well alongside video content and give you flexibility during editing .
Camera-Specific Audio Tips
4 Optimize Your Camera's Audio Input
If you're plugging a microphone directly into your camera:
- Manual audio levels: Turn off auto gain—it will pump up background noise during quiet moments.
- Set levels conservatively: Aim for peaks around -12dB. Camera preamps are often noisier than external recorders, so leaving headroom is crucial.
- Use external recorders when possible: Devices like the Zoom H5 record at higher bit depth and sample rates, and you can sync audio in post .
- Record a slate: Clap or say "take one" at the start to sync audio and video during editing .
If using a DSLR or mirrorless camera, record audio externally to ensure higher quality. Built-in preamps can introduce noise .
5 Recording Audio with Your Smartphone
You can use your mobile phone as an independent audio recording device by downloading specific apps .
- Protect from wind: If there's a lot of wind, protect the microphone with a wind protector or your hands .
- Use quality apps: Download a dedicated audio recording app rather than relying on the default voice memo app .
- Position carefully: Keep the phone's microphone (usually at the bottom) pointed toward the sound source.
6 Always Record Room Tone
Always record a few seconds of room tone (silence) at the end of your session. It helps editors remove background noise more effectively .
Also record at least 5 minutes of ambient sound of the place you're about to shoot. This can help cover potential mistakes or give your footage a better aesthetic .
Post-Production: Cleaning and Enhancing Audio
7 Clean Up Dialogue
Once you get your recordings, post-production is where everything gets shaped, cleaned, and layered .
Professional tools: Avid Pro Tools, iZotope RX, and Adobe Audition can clean up unwanted hums, hisses, and background chatter; repair muffled or distorted recordings; and match sound tone across takes .
AI-powered tools: For creators without high-end software, tools like Filmora offer AI Audio Denoise, Remove Hiss & Clicks, and Automatic Volume Leveling .
8 Apply Subtle Processing
Once you have a clean recording, subtle processing can refine it .
- Compression: Smooths out volume differences so your voice feels even and controlled throughout .
- Equalization (EQ): Gently reduces low-end rumble and enhances clarity in the upper frequencies .
These tools should support your voice rather than dramatically reshape it. If you find yourself using heavy processing to fix issues, revisit your microphone placement or room setup first .
9 Add Music and Ambience
Once your voice sounds clean and balanced, music can shape the overall feel of your content . A consistent intro theme, subtle background track, or transition cue helps your videos feel cohesive and recognizable .
The music accompanies and highlights the values of your content. It should not affect the storytelling but should be adapted to it . If you're transmitting detailed information, choose a flat background song without many changes that doesn't attract attention .
Free audio re YouTube Audio Library and other online music resources offer copyright-safe tracks . Universal Music for Creators provides access to over 50,000 copyright-safe tracks and sound effects .
10 Follow the 5-Stage Workflow
Understanding this flow makes audio post-production much smoother :
- Dialogue Editing: Clean and sync voices perfectly with video
- Foley & Sound Effects: Recreate everyday sounds like footsteps, doors, cloth movement
- Post Production Music: Add soundtrack or background score for emotion
- Mixing & Balancing: Blend dialogue, music, and effects naturally
- Mastering & Delivery: Final polish, level checks, prepare for release
Real-World Example: Sarah's Transformation
Sarah Lin, a DIY home improvement creator, started filming in her garage with a smartphone and basic lapel mic. Early videos suffered from echo, dim lighting, and inconsistent audio levels. After analyzing viewer drop-off points, she realized many left within the first 30 seconds—often due to poor sound .
Sarah invested $200 in improvements: a second-hand LED panel, a Rode NT-USB microphone, and some moving blankets to dampen sound. She repositioned her workspace to face a large window for natural light and used a reflector to bounce light onto her face. She also began recording voiceovers separately in a closet lined with clothes for better acoustics .
Within two months, her average watch time increased by 42%, and new subscribers rose by nearly 60%. Her attention to audio transformed her content from casual to credible—without changing her core message .
Essential Pre-Shoot Audio Checklist
- ✅ Environment: No background noise, echo controlled, soft materials present
- ✅ Microphone: Correct type chosen, properly positioned, windscreen/pop filter if needed
- ✅ Connections: Mic securely connected, cables not tangled or damaged
- ✅ Levels: Tested at normal volume, peaks around -12dB to -6dB, no clipping
- ✅ Monitoring: Headphones on, listening for issues in real time
- ✅ Backup: Consider recording a second audio source
- ✅ Test clip: Record a short test and play it back before starting full session
Common Audio Mistakes to Avoid
Do
- Use external microphones—built-in mics are rarely sufficient
- Monitor with headphones while recording
- Record room tone for noise removal
- Keep levels below 0dB (aim for -12dB to -6dB)
- Use 48 kHz / 24-bit settings
- Record a test clip before starting
- Turn off auto gain on camera
Don't
- Don't rely on in-camera microphones—they pick up handling noise
- Don't record in bare, echoey rooms
- Don't let levels hit 0dB (clipping distortion)
- Don't ignore background noise during recording
- Don't place mic directly in front of mouth—angle slightly
- Don't use heavy processing to fix bad source audio
Your 7-Day Audio Challenge
- Day 1: Assess your recording space. Listen for echoes and background noise. Add soft materials (rugs, curtains) .
- Day 2: Test different microphone positions. Record at 4, 8, and 12 inches. Listen to which sounds best .
- Day 3: Practice setting levels. Speak at normal volume, aim for -12dB peaks. Watch the meter .
- Day 4: Record with headphones for the first time. Notice issues you previously missed .
- Day 5: Record room tone and ambient sound. Practice using it in editing .
- Day 6: Edit dialogue from a previous recording. Apply noise reduction, compression, and EQ .
- Day 7: Produce a complete video with proper audio from start to finish. Compare to your first attempt.
Final Thoughts
Great audio comes down to thoughtful mic choice, smart placement, a controlled room, clean levels, and simple, consistent habits . When you focus on capturing clear sound at the source, everything else—from editing to music picks—becomes easier .
You don't need perfection; you need reliability and clarity . By mastering the fundamentals of audio recording, you build trust with viewers and create content that resonates long after the play button is pressed .