Gimbals are excellent tools for achieving smooth footage, but they aren't the only way to stabilize your camera . Whether you're traveling light, shooting in tight spaces, or simply don't have a gimbal in your kit, there are dozens of proven techniques to capture stable, professional-looking video. From ancient Hollywood handheld methods to modern post-production magic, this guide covers everything you need to know to shoot smooth footage without a gimbal.
Body Mechanics: You Are the Stabilizer
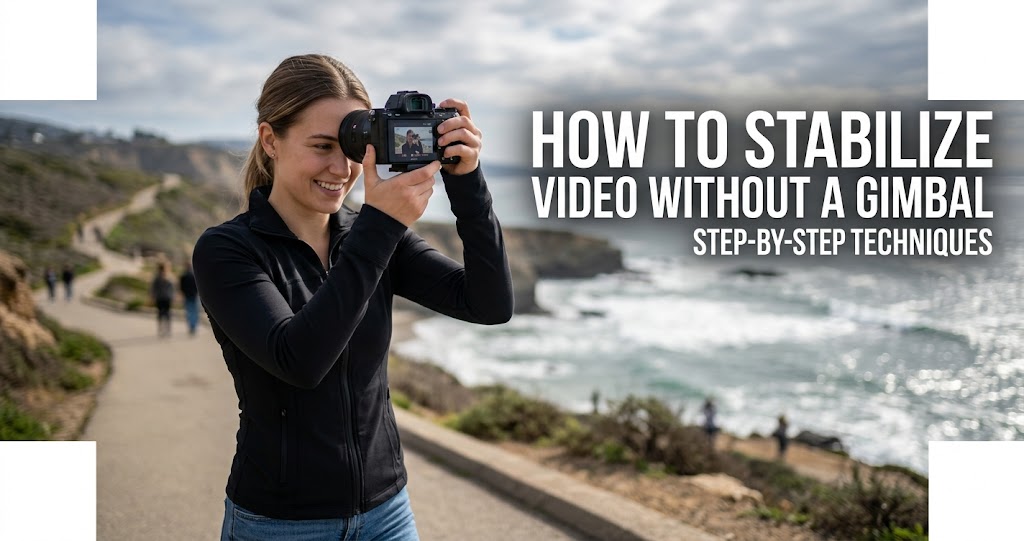
1 Master the 3-Point Contact Technique
The easiest way to steady your camera is to establish three points of contact with it . This technique, used by professional cinematographers, dramatically reduces micro-shakes and muscle fatigue.
The third point can vary depending on the shot. Using the viewfinder and pressing it to your face is the classic photographer's stance. Alternatively, you can point the rear screen upwards and press it to your ribs or chest (not your belly, as breathing affects your belly more) .
This is a personal favourite, especially when doing pans or walking. Position your neck strap around your neck or behind a shoulder. Tighten the strap enough so that at maximum extension your arms can be in a slightly tensed position. Then when you are going to shoot, press forward lightly with your arms to tension the shoulder strap around your neck or shoulder. This allows you to use the strap like a third point of contact, stabilizing and reducing strain on your arms .
2 Engage Your Core, Move from the Hips
To achieve smooth handheld pans and tilts, combine the 3-point technique with your core muscles. Position your body so your legs remain planted and then turn or tilt primarily using your core . This inherently limits how much ground you can cover, but it keeps the movement consistent. If you need to pan more than your core travel permits, compensate more with your arms before moving your feet .
- Keep feet shoulder-width apart: One foot slightly back for balance .
- Avoid locking your knees: Keep them slightly bent to move more fluidly .
- Slow, deliberate motion: When panning or tilting, rotate your torso instead of moving only your arms .
3 The Heel-To-Toe Walk
Walking completely smoothly with a camera handheld is nearly impossible without assistive technology, but you can mitigate unwanted effects .
- Roll from heel to ball of your foot: Your footsteps should be fluid rather than stompy .
- Keep a little bend in your knees: This gives your body more ability to stabilize .
- Move slower, but not too slow: Going fast is bumpier, but very slow movements are more taxing—find a happy medium .
- Walk in step with your subject: If tracking another person, keeping step with them creates the illusion of smoothness. While edges may still bounce, the subject appears more steady since your bobbing is in sync .
- Use a wider lens: Wide angles reduce the visual effects of walking because changes in the edges of your framing are less exaggerated than when zoomed in .
4 Control Your Breathing
Rapid breathing while filming can create small camera movements that make footage look unsteady . Focus on long, controlled breaths to stay calm and keep better control during handheld shots. Before you shoot, take a deep breath and exhale slowly. Press the shutter or record during your exhale to minimize shaking .
5 The Tuck, Crouch, and Lean
Your environment and body position are free stabilization tools:
- The Tuck Method: Tuck your elbows into your body, hold your camera close to your chest, and stabilize it using your torso .
- The Crouch Position: Kneel or crouch down, creating a lower center of gravity, which naturally stabilizes your movements .
- Lean Against Solid Objects: Utilize walls, trees, or any sturdy structure to anchor yourself while shooting .
- Lay Down: For low-angle shots, lying on the ground provides a solid base .
Brace yourself against a stable surface to reduce unwanted motion. Rest your elbows on a table or support your forearms on a sturdy object when shooting from a low angle .
Camera Settings for Stability
6 Use Image Stabilization Technology
Many modern cameras and lenses come equipped with image stabilization (IS) technology that compensates for minor camera movements . Image stabilization, also called Steadyshot by Sony, is an amazing technology and you should make sure that you have it active on your camera when shooting handheld .
Types of stabilization:
- Optical Image Stabilization (OIS): Hardware-based, works by adjusting for movement in real-time using the lens elements .
- In-Body Image Stabilization (IBIS): The sensor itself shifts to compensate for movement.
- Electronic Image Stabilization (EIS): Stabilizes video digitally by processing footage post-capture .
Familiarize yourself with your camera settings—most cameras allow you to toggle IS on and off . Some cameras offer multiple stabilization modes, such as Panasonic's E-Stabilization (Video) which corrects vertical, horizontal, pitch, and yaw axes . Boost I.S. mode increases effectiveness when recording from a fixed perspective .
7 Choose the Right Frame Rate and Shutter Speed
Shooting at a higher frame rate (60fps or 120fps) allows for better slow-motion stabilization in post-processing . When played back at 24fps or 30fps, the slow-motion effect can smooth out minor shakiness .
Adjust your camera's shutter speed. A good rule of thumb is to set it to roughly double your frame rate. For example, if you're shooting at 60 frames per second, aim for a shutter speed of about 1/120s . A faster shutter speed can make motion appear choppy, while a slower shutter speed can introduce blur .
Shoot in well-lit environments to ensure your camera can maintain higher shutter speeds, which is crucial for smooth footage .
Low-Tech Tools and DIY Rigs
8 The String Tripod (Under $1)
If you're on a budget, a string tripod might be just the solution you're looking for. It's a simple DIY solution that can stabilize your shots effectively .
How to create one: Tie a length of string to the bottom of your camera (use the tripod mount) and then attach the other end to a weight or a sturdy item on the ground. Keep tension in the string; this will help minimize any unwanted movements, acting similarly to a gimbal .
This method comes in handy especially for shooting in crowded places or when you can't afford an expensive stabilizer .
9 Everyday Objects as Stabilizers
If you don't have professional equipment, everyday items can serve as makeshift stabilization tools .
- Tripods and monopods: Even the smallest tabletop tripod can make a huge difference. A monopod can act as a stabilizer, especially when walking .
- Books or cushions: If filming indoors, stack books or use soft objects to prop up your phone for a steady shot .
- Rubber bands: If you have an additional stick (like a broomstick), wrap rubber bands around your phone and the stick. This setup reduces vibrations while providing a makeshift stabilizing handle .
10 Shoulder Rigs and Harnesses
For greater control, try a shoulder rig or harness. These tools balance the camera on your shoulder so you can shoot at eye level with added stability . Because DSLR and mirrorless cameras can be heavy, carrying them for long stretches may cause arm fatigue and camera shake .
If you're filming on the move or want a first-person angle, a chest mount offers hands-free operation without sacrificing steadiness .
Post-Production Stabilization Software
11 Free Video Stabilization Software
If you find yourself with some shaky footage, all hope is not lost. There are excellent free options to stabilize video in post-production .
Gyroflow is particularly impressive—it's an advanced video stabilization tool that uses gyro data for accurate motion compensation. It's blazingly fast, easy-to-use, and available for all platforms. It's free and open-source . With the help of precise lens calibrations, rolling shutter correction, and tweakable stabilization algorithms (including horizon levelling), Gyroflow can produce gimbal-like stabilization with no weight penalty .
12 The 3-Step Stabilization Workflow
Most stabilization tools work similarly. Here's a general workflow that applies to PowerDirector, iMovie, and similar software :
- Step 1: Import your shaky video into the editing software .
- Step 2: Locate and apply the video stabilizer tool (often found under "Fix/Enhance" or "Edit" menus) .
- Step 3: Fine-tune the stabilization level. The default is often 50%, but you can adjust up or down. A higher number enhances stabilization but results in more cropping .
Use split preview to compare before and after side by side, ensuring your video isn't too cropped . Some software also offers advanced options like "Fix Rotational Camera Shake" for handheld footage or "Enhanced Stabilizer" for non-directional shakiness .
13 Crop and Stabilize in Post
Most editing tools have stabilization features that work by slightly cropping the edges of your frame and applying algorithms to smooth movements . This method requires additional time but can significantly elevate quality, especially for projects that demand perfection .
In Camtasia, you can add subtle zoom or pan keyframes to follow your subject and smooth the motion, then crop slightly to hide edge jitter after adding zoom or pan effects . Slowing down short clips can also make any remaining movement feel more natural .
Smartphone-Specific Techniques
14 iPhone Stabilization Hacks
Modern iPhones come equipped with advanced stabilization technologies like Optical Image Stabilization (OIS) and Electronic Image Stabilization (EIS) . These features are automatic, so you don't have to manually enable them—just take advantage of the advanced optics by holding your device as steady as possible .
- Ensure your iPhone is updated: Software updates often include enhancements to video stabilization .
- Choose the right camera mode: Filming at 1080p at 30fps ensures greater stability since these settings demand less processing power .
- Third-party apps: Adobe Premiere Rush, LumaFusion, and Emulsio offer powerful stabilization algorithms post-capture .
15 Shoot in Slow Motion for Stability
Slow-motion video has the unique advantage of making movements appear more fluid and stable . By filming in slow motion, you can disguise small shakes or inconsistencies, giving the footage a polished appearance. On your iPhone, simply access the "Slo-Mo" mode in the camera app and adjust the recording speed as needed .
This method works particularly well for capturing dynamic actions like sports, nature, or events where achieving perfect steadiness is difficult .
Common Mistakes to Avoid
Do
- Use the 3-point contact technique every time
- Tuck elbows into your body for a solid base
- Engage your core for pans and tilts
- Enable image stabilization on your camera
- Shoot at higher frame rates (60fps+) for slow-mo stabilization
- Use wider focal lengths when walking
- Take advantage of free stabilization software like Gyroflow
Don't
- Don't lock your knees—keep them slightly bent
- Don't hold your camera with just one hand
- Don't forget to breathe slowly while shooting
- Don't rely on caffeine before handheld shoots
- Don't use digital zoom—it amplifies movement
- Don't skip post-production stabilization when needed
Your 7-Day Stabilization Challenge
- Day 1: Practice the 3-point contact technique. Shoot 2 minutes of footage focusing on form, not content .
- Day 2: Master the heel-to-toe walk. Film yourself walking at different speeds, analyze which is smoothest .
- Day 3: Experiment with camera settings. Compare footage with IS on vs. off, 24fps vs. 60fps .
- Day 4: Build a string tripod and test it in a crowded environment .
- Day 5: Try the shoulder strap tension technique while panning .
- Day 6: Download Gyroflow and stabilize your shakiest clip from the week .
- Day 7: Combine everything—shoot a 1-minute walking shot using proper technique, then fine-tune in post .
Final Thoughts
Gimbals are excellent, but they aren't always accessible or practical for everyday use . With advancements in technology and a bit of creativity, you can achieve smooth and steady video without resorting to a gimbal . The key to success is practice and experimentation. Embrace these methods, adapt them to your unique filming needs, and watch as your footage transforms into perfectly stabilized content that conveys your vision flawlessly .
With the right methods, stabilizing your camera without a gimbal is not only possible but can also yield exceptional results . While gimbals are excellent tools, understanding fundamental stabilization techniques can often prove just as effective. So gather your gear, apply these methods, and begin your journey toward mastering stable footage, allowing your creativity to flow uninterrupted .