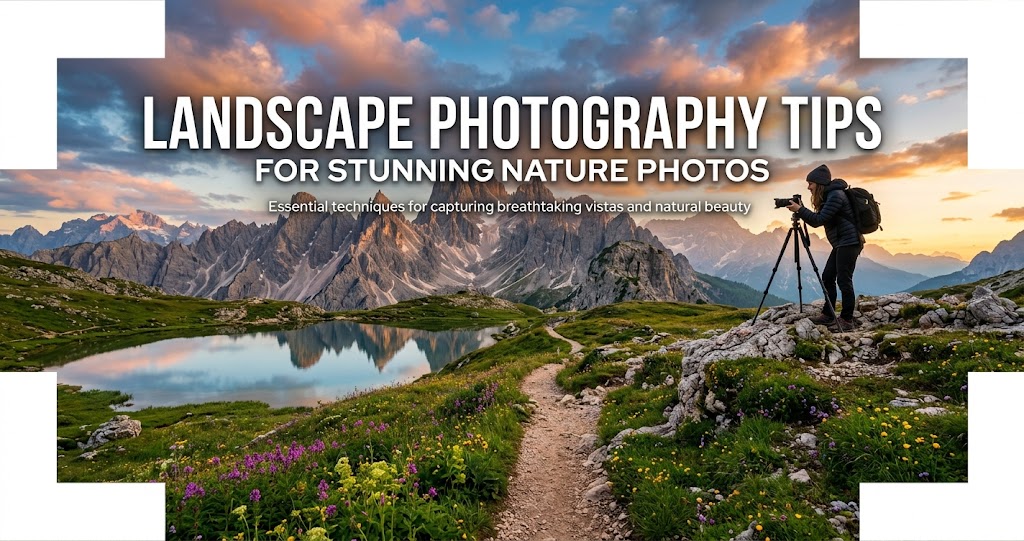
Landscape photography is one of the most rewarding genres—it gets you outside, connects you with nature, and challenges you to capture the beauty of the world around you. But stunning nature photos don't happen by accident. They require preparation, understanding of light, strong composition, and the ability to adapt when conditions change .
In 2026, landscape photography is evolving. Photographers are moving away from chasing dramatic hero shots and instead focusing on storytelling, emotional connection, and creative expression . Whether you're a beginner or an experienced shooter, this comprehensive guide covers everything you need to capture breathtaking landscape images—from essential gear and camera settings to advanced composition techniques and post-processing secrets.
Understanding Light: The Foundation of Great Landscapes
1 Shoot During the Magic Hours
The times around sunrise and sunset provide the best light, with a range of tones that can easily be captured by a modern digital camera . Rapidly changing conditions make interesting lighting effects, and the wind is often greatly reduced in the early morning .
Golden hour offers warm, soft, directional light. Blue hour (just before sunrise or after sunset) provides cool, even light with rich colors in the sky. Both are prime times for landscape photography.
2 Predict Light, Don't Chase It
Many photographers believe strong landscape images come down to luck. Right weather, nice sunrise, dramatic clouds. But even with seemingly perfect conditions, the results often feel disappointing .
The reason is simple: light is misunderstood. It's not enough to know when sunrise or sunset happens. What matters far more is where the light comes from, how it moves through terrain, and which parts of the scene it actually touches .
Use planning tools like PhotoPills or The Photographer's Ephemeris to visualize the sun's path. This eliminates most uncertainty. Instead of asking "Will it work?", you start asking "Which option works best if the light breaks here?"
3 Master Light Direction
Whether the light comes from the front, side, or behind your subject completely changes how a landscape reads in the final image. Texture, depth, contrast, and atmosphere depend on it .
- Front light: Even ilSHOTAVIXtion, vibrant colors, but can look flat
- Side light: Reveals texture and shape, adds drama and depth
- Backlight: Creates rim light, silhouettes, ethereal glow
4 Don't Fear Rain, Fog, or Stormy Weather
Some of the most beautiful and usable light occurs during a light rain or drizzle. Extremes of contrast from light to dark disappear, allowing a tremendous amount of detail. This is the time to be in the forest or among the plants in a field .
With climate change affecting conditions worldwide, photographers are embracing fast-changing or harsh weather rather than waiting it out. "Preparation is everything. I try to arrive early, choose a clean composition and then let the weather move through the frame rather than chasing it" .
Essential Camera Settings
Quick Reference: Landscape Photography Settings
5 Choose Aperture for Depth and Effect
For landscapes where you want everything sharp from foreground to background, use f/8 to f/16 . Smaller apertures (f/16–f/22) also create a sunburst effect when the sun is partially obscured, adding drama to your images .
To get a sunburst, close your aperture to f/16 or smaller. The actual presence and quality of the burst depends on your lens and how many blades make up its aperture .
6 Use a Tripod—Every Time
Shooting during the magic hours or in low-light conditions such as drizzle can require long exposures—a number of seconds, at least. A tripod is a necessity at these times .
It also forces you to slow down, compose carefully, and consider each element in the frame—a discipline that leads to better images .
7 Master Hyperfocal Distance
To maximize sharpness throughout the frame, focus about one-third of the way into the scene. For precise work, use hyperfocal distance charts or apps. Many modern cameras have focus peaking to help you see exactly what's in focus .
Composition: Building Powerful Images
8 Include Strong Foreground Elements
One of the best ways to give your viewer a sense of place and depth is to find strong foreground elements . Placing objects at varying distances within the picture plane creates a more interesting image. This helps to create a sense of scale, drawing the viewer in .
Effective foreground subjects include rocks, wildflowers, logs, water ripples, or interesting textures . A sharply focused foreground rock with wildflowers leads the eye toward distant mountains, creating three distinct depth planes .
9 Apply (and Break) the Rule of Thirds
The rule of thirds divides your frame into a 3×3 grid. Place points of interest along these lines or at their intersections . Avoid centering the subject—placing your subject in the center of the frame will, instead of highlighting it, give equal importance to the subject and everything around it .
But rules are meant to be broken. Centering your subject can convey strength and simplicity when the subject is clearly dominant or the scene has symmetry .
10 Use Leading Lines to Guide the Eye
Leading lines are visual pathways that draw the viewer's eye through your photograph toward a focal point . Common natural leading lines include rivers or creeks, trails or paths, rows of trees, and rock formations or ridgelines .
In a canyon sunrise shot, a winding creek becomes a leading line directing attention from the foreground to the glowing mist of distant mountains .
11 Build Depth with Foreground, Midground, Background
Depth is one of the most powerful tools in nature photography composition . Actively look for :
- Foreground: rocks, flowers, textures, water movement
- Midground: trees, hills, flowing lines
- Background: mountains, sky, distant patterns
12 Keep Horizons Level
Avoid tilted lakes. Unless you are trying to achieve an exaggerated effect, horizon lines should be level. Use the camera's viewfinder grid lines or a hot-shoe mounted bubble level to make sure .
13 Avoid Large Featureless Areas
Large areas without interesting details should generally be avoided, as they draw attention from other parts of the image. A blank sky, for instance, whether blue or overcast, is a distraction in an image. Wait for clouds to add interest to the scene .
Creative Techniques for 2026
14 Try Intentional Camera Movement (ICM)
If the light doesn't materialise as hoped, ICM allows you to get creative and produce unique, artistic images regardless of the conditions . This technique uses deliberate camera motion during a slow exposure to blur detail and transform light, colour and form into expressive, mood-led images rather than sharp, literal records of a scene .
The key is to start with a strong composition, just as you would with a traditional landscape, and then introduce movement to transform it .
15 Tell Stories Through Sequences
2026 is seeing a shift away from single dramatic hero images towards storytelling through sequences . Instead of focusing on one "hero" landscape, build a story through details, wide scenes and transitions rather than relying on one perfect frame .
Think in pairs or triptychs. A sequence showing snow settling on a roof at sunrise, boots by the door, and the vast white forest opening up behind the cabin—none of the images is particularly dramatic on its own, but together they capture the feeling of waking up in total silence .
16 Practice Slow Travel and Mindfulness
Instead of trying to visit as many places as possible, people are choosing fewer locations and spending more time in each one, allowing them to properly immerse themselves in the scene .
This mindful approach leads to more thoughtful, meaningful images. Slow down, walk around, observe how the light behaves, and resist the temptation to lift the camera immediately .
17 Consider Using Artificial Light
Artificial light in photography offers a unique advantage by allowing photographers to brighten and emphasize their subjects whenever they choose . Using drones equipped with specialized lights, photographers can create striking, dream-like images that give new life to familiar settings .
Preparation and Fieldwork
18 Do Your Online Reconnaissance
Before setting out on a nature shoot—especially at an unfamiliar location—take time for online research .
- Check weather forecasts and potential hazards
- Use apps like PhotoPills and The Photographer's Ephemeris to predict sun and moon paths
- Explore with Google Maps to understand terrain and find compositions
19 Protect Your Gear from Inclement Weather
If forecasts call for mild temps with scattered clouds, still be prepared for the chance of heavy showers . When combating water—be it from rain or waterfall spray—focus on manually locking in your composition and focus, then use a clean microfiber cloth to dry the lens surface before firing .
20 Be Aware of What's Going On in All Directions
Don't be fixated by a small portion of the scene surrounding you. Conditions in nature can change rapidly. Always look behind, down and up to see if there are other things going on that you may be missing .
Post-Processing and Editing
21 Embrace Reality in Your Editing
In a world of fake AI imagery and over-edited pictures that chase a version of 'perfection', there's a growing return to 'what you see is what you get' in photography . Working with what you have in a scene, instead of thinking "I'll remove/change that in post," has its benefits .
Light is sometimes flat, skies are not always dramatic and weather is unpredictable but, to me, the constantly changing nature of landscapes is what makes them beautiful .
22 Communicate How a Place Felt, Not Just How It Looked
Using imagination, curiosity and flexibility leads to stronger photographs . Post-processing techniques should communicate how a place felt, not just how it looked .
Adjust exposure and contrast, refine white balance, and reduce noise—but keep the soul of the scene intact.
Common Mistakes to Avoid
Do
- Shoot during magic hours (sunrise/sunset)
- Use a tripod for every shot
- Include strong foreground elements
- Keep horizons level
- Check all four edges of the frame for distractions
- Work the scene from multiple angles
- Embrace challenging weather conditions
Don't
- Don't rely on luck—plan and prepare
- Don't center every subject
- Don't ignore the sky—blank skies are distractions
- Don't pack up when conditions get rough
- Don't over-edit and lose the reality of the scene
- Don't leave image stabilization ON when on tripod
- Don't forget to check for moving elements (wind in trees, grass)
Your 7-Day Landscape Challenge
- Day 1: Local scouting. Visit a nearby park and spend 30 minutes just observing before shooting .
- Day 2: Practice foreground interest. Find a scene and shoot with and without a strong foreground element. Compare results .
- Day 3: Master leading lines. Find roads, rivers, or paths and use them to guide the eye .
- Day 4: Sunrise shoot. Wake up early and capture golden hour. Review what worked and what didn't .
- Day 5: Try ICM. On a day with flat light, experiment with intentional camera movement .
- Day 6: Create a sequence. Shoot a series of images that tell a story about a place .
- Day 7: Edit your five best images from the week, focusing on subtle, reality-based adjustments .
Final Thoughts
Great landscape photography isn't about finding the most dramatic location or waiting for perfect conditions. It's about developing your eye, understanding light, and connecting deeply with the natural world .
As photographer Kim Grant puts it, "When we adopt a more mindful approach, we really allow ourselves to take in the places we travel to. Rather than ticking locations off a bucket list, we spend more time in each one, forming long-lasting memories and creating more thoughtful, meaningful images" .
The constantly changing nature of landscapes is what makes them beautiful. Light is sometimes flat, skies are not always dramatic, and weather is unpredictable—but that's the magic .