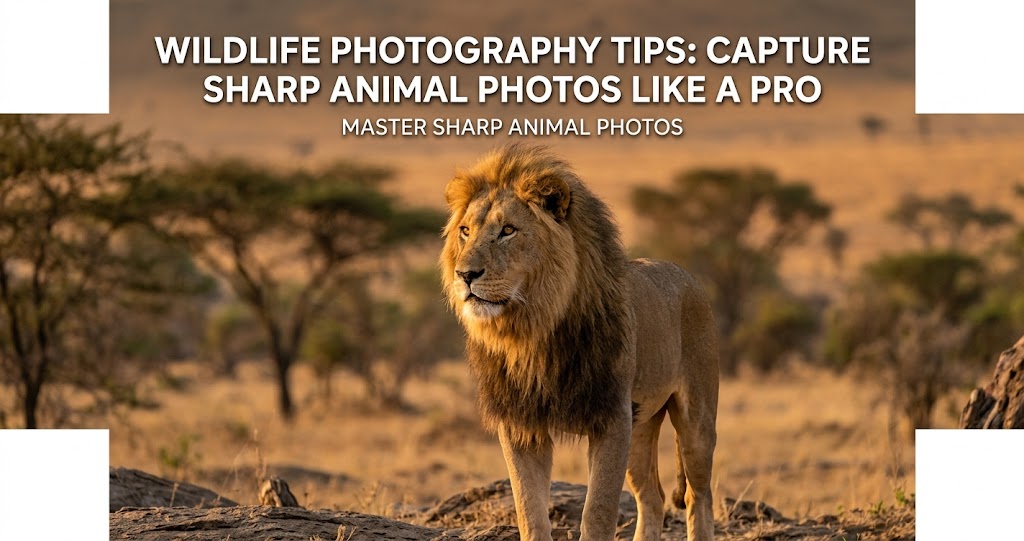
The question I get asked most often is how to take sharp wildlife photos . Wildlife photography is one of the most demanding genres in photography . Your subjects are unpredictable, often far away, constantly moving, and appear in lighting conditions you cannot control. There are no second chances—a bird taking flight or a fox glancing in your direction happens once .
After years of field experience and learning from pros, I've compiled the definitive guide to capturing tack-sharp animal photos. These wildlife photography tips cover everything from shutter speed secrets and animal eye AF to long lens technique and ethical fieldcraft. Whether you're shooting backyard birds or on safari, these strategies will transform your results.
Camera Settings for Sharp Wildlife Photos
1 Shutter Speed: The Non-Negotiable Foundation
The first question I ask someone who tells me their images are not sharp is, "what was your shutter speed?" . You may be familiar with an old rule of thumb that when hand-holding, shutter speed should equal or exceed focal length. For a 500mm lens, that means 1/500th .
I contest that this rule does not apply to today's high megapixel cameras where camera shake effects are even more pronounced. With 45MP+ cameras common, my new rule: double the focal length ratio where possible. With a 500mm lens, shoot at 1/1000th if light permits .
Pro tip: For freezing birds in flight, my go-to shutter speed is 1/3200th and even faster for hummingbirds. If light is low, raise ISO—it's always better to have a sharp image at higher ISO than a soft image at low ISO .
2 Shoot Wide Open, But Know When to Stop Down
In wildlife photography, aperture is largely dictated by your lens. Most wildlife photographers shoot with 100-400mm or 150-600mm telephoto lenses with max apertures of f/5.6 or f/6.3 .
Shoot wide open: Use your lens's maximum aperture. At 400mm f/5.6, backgrounds blur beautifully, isolating your subject. You also need every photon of light because shutter speed must be fast .
When to stop down: Photographing groups at different distances (herds, nests, birds with spread wings) requires f/7.1–f/8 for depth of field . For multiple subjects like a loon pair with chicks, stop down to f/11 or f/13 to keep all eyes in focus .
Pro tip: Shooting at f/2.8 provides gorgeous background separation but reduces margin of error. For birds in flight, improve keeper rate by shooting at f/8 to ensure eye and wings are in focus—though backgrounds will be sharper .
3 Use Auto ISO Intelligently
Auto ISO is a wildlife photographer's best friend . Set your aperture wide open, set your minimum shutter speed (e.g., 1/2000s), and let the camera adjust ISO between 100 and 6400. As animals move from sunlight to shade, exposure stays correct without touching a dial .
Configure Auto ISO properly:
- Minimum shutter speed: 1/1000s–1/2000s (based on subject)
- Maximum ISO: 6400 (or 12800 if your camera handles it well)
- Minimum ISO: 100
Pro tip: Run tests to determine your camera's maximum usable ISO. You can remove noise in post-processing with tools like Topaz Denoise AI, but you cannot recover a blurry image .
Quick Reference: Wildlife Photography Settings
Mastering Autofocus
4 Use Continuous AF (AF-C) Exclusively
Even "stationary" animals make small movements—turning heads, shifting weight, or suddenly bolting. Continuous AF tracks these movements in real-time .
Single Shot AF locks focus once and does not update—if the animal moves even slightly before you shoot, focus is missed .
Back-Button Focus: Separate focus from the shutter button. Assign AF to the AF-ON button on the back of your camera. Press and hold AF-ON to track; release to lock. This gives instant switching between continuous and locked focus .
5 Leverage Animal / Bird Eye AF
Modern mirrorless cameras from Sony, Nikon, and Canon have dedicated animal and bird eye AF modes. These automatically detect and track the animal's eye—use them .
They dramatically improve your keeper rate for wildlife portraits. If you can only get one thing in focus, make it the animal's eyes for a sharp and compelling image .
Pro tip: When time permits, manual focus with focus peaking ensures maximum sharpness where you want it .
6 Choose the Right Focus Area
Today's cameras offer myriad focus options: 3D tracking, wide area, dynamic, and more. Many cover large areas where the camera decides sharpness .
Single point focus selects a very small area—placing that box on the eye guarantees it will be the sharpest part of your image .
Dynamic Area / Zone AF is ideal for birds in flight, tracking subjects as they move across the frame .
Pre-focus on known perches: If you know where an animal will appear, pre-focus on that spot. When the animal arrives, focus is already close and locks almost instantly .
Long Lens Technique: The Art of Stability
7 Master Long Lens Handholding
Long lenses are prone to vibration that travels to your camera, causing camera shake. Your technique is critically important .
- Place your hand and arm along the lens barrel to dampen vibration
- Press your eye socket firmly against the camera (consider an after-market eyecup)
- Use a slow rolling motion with your finger—jabbing introduces vibration
- Shoot bursts—the first image or two have the most vibration; later frames in a burst are often sharper
8 Invest in Proper Support
You spent good money on a long lens—equally important is investing in a well-made tripod .
- Carbon fiber: More rigid than metal, warmer in winter
- No center column: Extending a center column adds instability and wobble
- Gimbal head: Makes panning big lenses smooth and effortless—ball heads are much harder to pan smoothly
Gimbal head pro tip: The knobs that control panning are meant to be locked only for transport. When shooting, loosen them enough so there's slight resistance—just enough that the lens doesn't swing on its own. Tightened knobs introduce vibration .
9 Know When to Use (and Turn Off) Image Stabilization
Every brand has stabilization (VR/IS/IBIS) allowing 3-6 stops slower shutter speeds. But you need to know when to turn it off :
- OFF at shutter speeds above 1/500th
- OFF for shutter speeds slower than one second
- OFF when shooting from a tripod (the mechanism can generate micro-vibrations)
Use stabilization primarily when hand-holding in low light under 1/500th .
Fieldcraft: The Hidden Half of Sharpness
10 Patience and Observation
Animals operate on their own schedules. Spending extended periods waiting leads to capturing natural behavior and the right moment . Use waiting time wisely—observe surroundings and anticipate the animal's next move .
Creating extraordinary images requires seeing animals through their natural rhythms, not human expectations. Understanding migration patterns, feeding habits, and social interactions transforms photography from passive to active study .
11 Approach with Respect
Learning to read when an animal is stressed or comfortable from body language is critical—and stress responses vary dramatically by species .
- Small owls often freeze when stressed (people think they're comfortable—opposite is true)
- Larger owls tend to fly away when upset
Ethical imperative: Do our best to minimize harm. In winter, fleeing costs animals critical energy when replenishing is difficult .
The best photos come when a subject is comfortable—you have space to try different angles and compositions, and can capture behaviors missed if an animal is stressed .
12 Research Animal Behavior
Understanding an animal's life cycle, migration patterns, and social interactions allows you to position yourself where extraordinary action is likely .
Example: Wild horses along the coast seek relief from biting flies by wading into the ocean during summer. Knowing insect life cycles put me in exactly the right place when horses surged into the water, creating massive splashes .
Pro tip: Research heavily—wildlife hot spots, seasonal changes (fall color as background), when animals have young, migration timing. A percentage of that effort yields more successful results .
13 Think Beyond Basic Portraits
Not every image needs to be a close-up portrait. The compositional skills you develop as a landscape photographer translate to unique wildlife images .
- Go wider: Show the connection between animal and its environment
- Use light creatively: Backlight or sidelight adds drama and depth
- Create a shot list: Include action shots, environmental portraits, close-up details
Dynamic action: Freezing water droplets mid-air or capturing a predator's strike conveys energy. Technical mastery (fast shutter speeds, continuous shooting) is a means to convey emotion and motion .
Essential Gear Recommendations
14 Choose the Right Lens
The 100-400mm or 200-600mm lens class is recommended for most photographers—adequate reach, low light sensitivity, and flexibility .
Prime lenses like 400mm f/2.8 or 600mm f/4 offer speed and sharpness but at high cost and weight. Consider renting for specific trips .
Pro tip: Zoom lenses may vary in sharpness across focal length range. Analyze your images at various lengths to know where your lens is sharpest .
15 Don't Forget Essential Accessories
- Quality tripod: Carbon fiber, heavy-gauge legs, no center column
- Gimbal head: Essential for smooth panning
- Remote shutter release: Minimizes vibration
- Eyecup: After-market eyecup lets you press eye comfortably against viewfinder
- Dry bags and excellent camera bag: Vital for protection
Common Wildlife Photography Mistakes
Do
- Use shutter speed at least double focal length
- Set minimum shutter speed in Auto ISO
- Use Continuous AF (AF-C) ALWAYS
- Focus on the eye—sharp eyes make the image
- Shoot in bursts (first frames have most vibration)
- Learn animal behavior for better anticipation
- Leave space in direction animal is looking/moving ("lead space")
Don't
- Don't use shutter speeds below 1/500th for stationary wildlife
- Don't use Single Shot AF—animals move
- Don't shoot in Single Drive mode—burst captures peak action
- Don't center every subject
- Don't ignore the background—clutter ruins sharp images
- Don't leave stabilization ON when on tripod
- Don't get so close you stress the animal
Your 7-Day Wildlife Sharpness Challenge
- Day 1: Local park with pigeons/seagulls. Practice tracking birds at 1/2000s, f/5.6, AF-C. Review keeper rate—if under 30% sharp, adjust technique .
- Day 2: Shutter speed comparison—shoot same active subject at 1/250s, 1/1000s, 1/4000s. Build intuition for minimum speeds .
- Day 3: Test your lens's sharpest apertures. Shoot a test chart from f/2.8 to f/16 .
- Day 4: Practice proper long lens handholding technique—arm along lens, eye pressed firmly, slow shutter roll .
- Day 5: Backyard bird setup. Set up feeder with clean background, pre-focus on perch, shoot for 30 minutes .
- Day 6: Study animal behavior. Spend an hour just observing without shooting—note patterns, stress signals, movements .
- Day 7: Combine everything: research a location, arrive early, practice ethical fieldcraft, nail sharp focus.
Final Thoughts
Wildlife photography is certainly one of those genres that requires a lot of patience and a little luck. But putting in the time in nature can be tremendously rewarding: you gain deeper knowledge and respect for the biodiversity that surrounds us . With that greater knowledge and respect comes better photography .
The most important factor is persistence. Dedication over months and years allows you to revisit subjects, refine techniques, and witness rare behaviors. By returning to the same location repeatedly, you develop intuition, anticipate behaviors more accurately, and create a portfolio that reflects both technical skill and personal vision .